Introduction
Lately, I started getting into hardware hacking and decided to analyze the Tapo C220 camera. This post shows a walkthrough of a possible way to extract firmware from the Tapo C220 camera using a chip-off technique.
Tapo C220
The Tapo camera is, as mentioned on the Tapo website and shown in the following image, a Home-Wifi Security Camera with a lot of capabilities such as night vision, 360º horizontal and 114º vertical view range, intelligent AI detection, sound and light alarms, two-way audio, capability for MicroSD slot storage and ability to connect with applications such as google assistant and Alexa.

CH341A Programmer
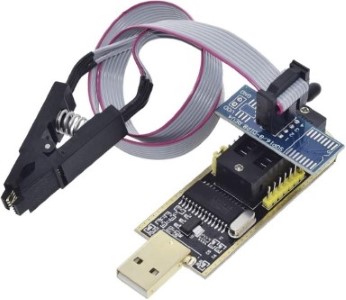
The CH341A Programmer is a tool commonly used to program Flash Memory, a typical component in the IoT boards that stores the firmware inside of it. This programmer has SPI and I2C protocol communication capabilities and comes together with an SOP 8 Clip that can be attached to a chip and connect directly to the programmer. The following image gives a visual representation of the kit composition.
Dismantling process
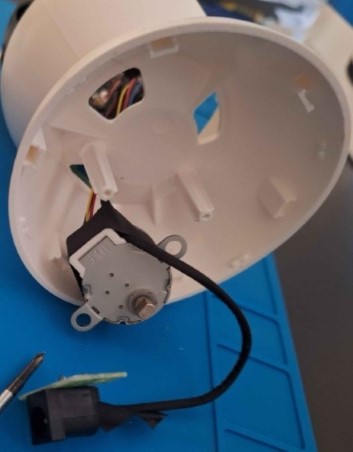
To start, the first step is to disassemble the camera. Important findings, connections, and other data can be documented during this process for later use. Upon opening the camera, the presence of a small motor and the power supply line for the camera can be found, as displayed in the following image.
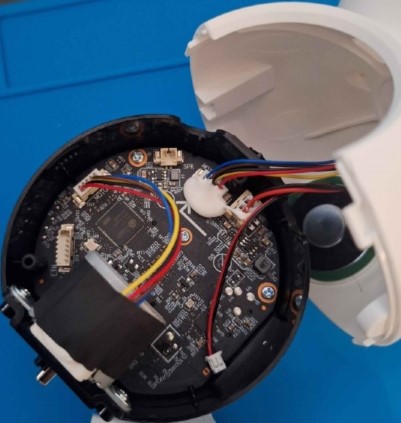
From the top side, we can identify the camera horn, another motor, and the camera board, as seen in the next image.
Board Analysis
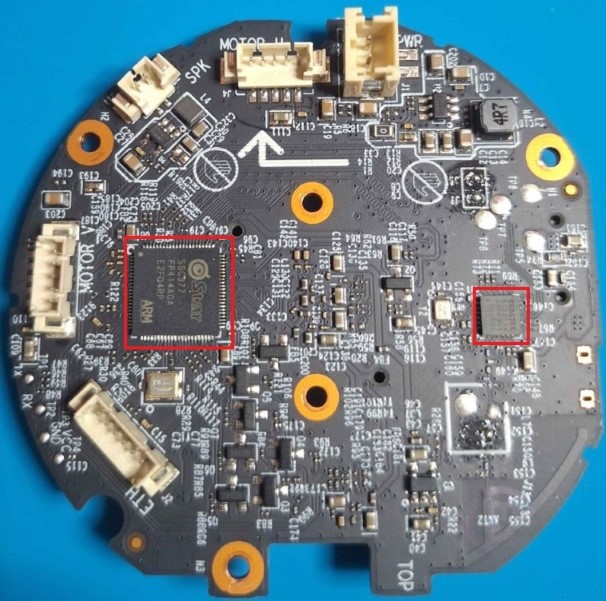
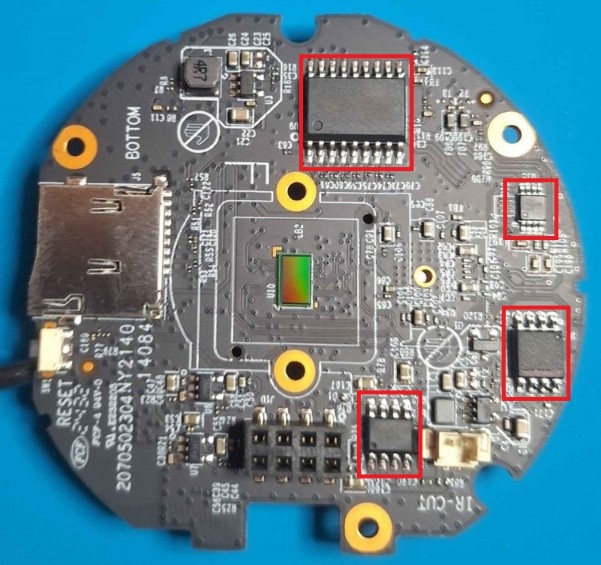
Looking at the board in the next image, its possible to see, from the bottom side, the SOC in use is a SigmaStar SSC377 and also the Realtek 8188FTV Chip that provides the board with Wi-Fi Capabilities.
At the other side of the board, there is a YW UTC2803M 18-pin transistor array, an LPS LPA2010 Audio Amplifier Chip, a MX6209 Motor Driver Chip and the XMC 250QH128C Flash memory.
Firmware Extraction
For the firmware extraction, I make use of the AsProgrammer Software capable of identifying and reading/writing to the chip and to make it easier, the application folder contains the necessary Windows drivers required to use the CH341A. To read the firmware, I removed the Flash Memory chip from the board because the first few reads were failing and full of null bytes, which can sometimes mean there is some interference from other board components while reading.
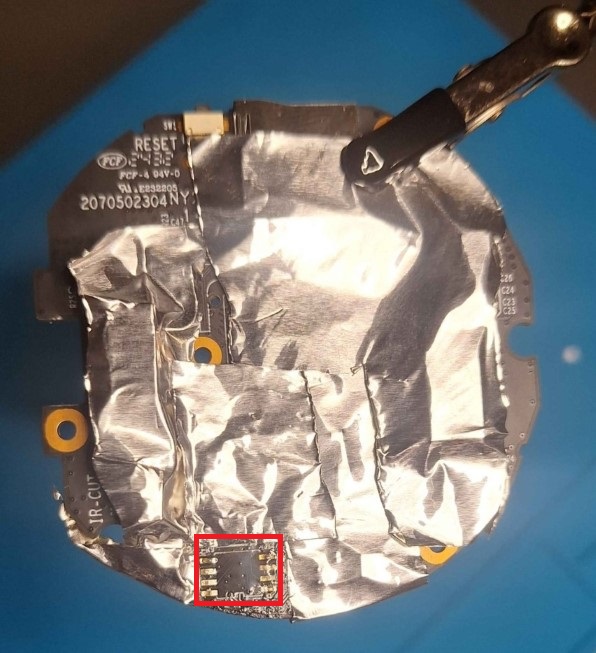
To do this, the board components were covered in aluminum tape to protect them from getting direct heat and leaving them out of place when using the hot air gun. Starting with the Soldering iron and using desoldering tape, it was possible to remove the solder from the connector pads. Then, I used the hot air gun with tweezers to help lift the memory chip out of its place. The following image shows the board covered with the tape and the memory already removed.
With the memory out of its place, I can now attach it to the CH341A with the clip as shown in the following image.

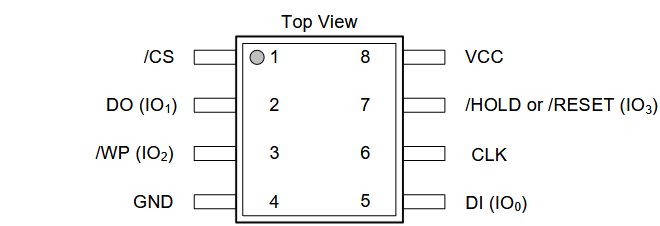
The orientation for the red wire should be at the 1º position of the connector pads, which is the Chip Select, as seen in the datasheet for the memory and represented in the following image. Another essential thing that must be confirmed in the datasheet is the input voltage and the protocol in use, which, in this case, is 3.3V and SPI.
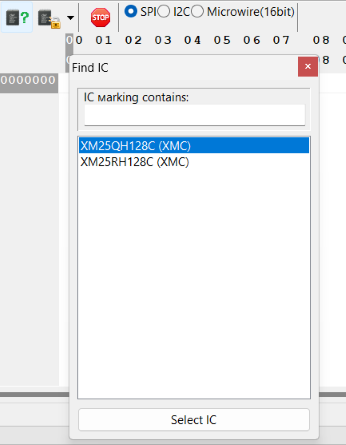
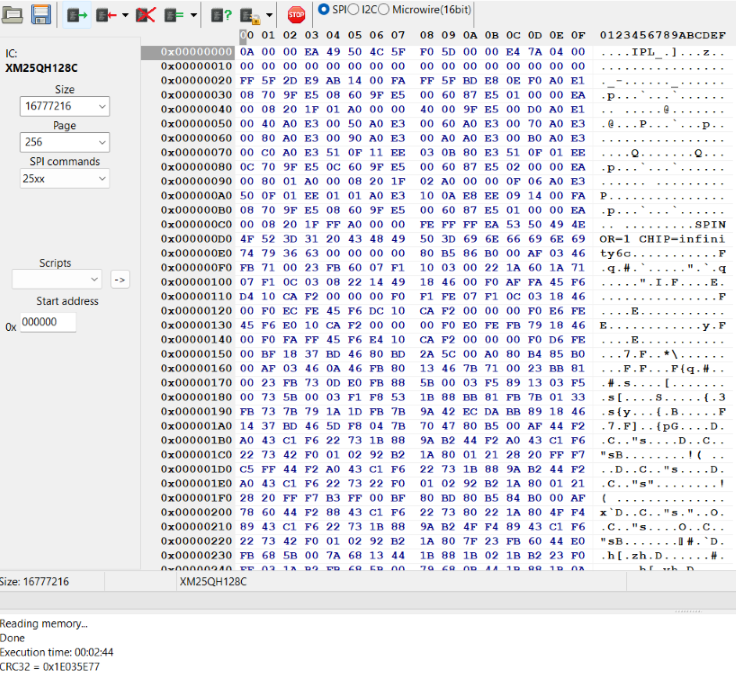
Moving to the AsProgrammer software and using the “Read IC” function to detect which chip is being read. It is possible to see that two chip possibilities were immediately identified: XMC25QH128C and XMC25RH128C, as seen in the following image. We can select the correct one and then read the chip data.
After a few minutes, many data bytes were filled out, which most likely indicates our read was successful.
By saving the file and running binwalk on it, it is possible to see that the filesystem was correctly identified as squashfs, allowing us to proceed with the software reverse engineering.
┌──(python_venv)─(kali㉿kali)-[~/Desktop/tapoc220/store_firmware]
└─$ binwalk tapo_firmware.bin | grep SquashFS
4194304         0x400000         SquashFS file system, little endian, version: 4.0, compression: xz, inode count: 165, block size: 65536, image size: 6899808
Conclusion
This was a good opportunity to revisit a useful firmware extraction technique while applying it to a commercial device,
Best regards, Diogo